
 March 21, 2026
  11 Min
  No Comment
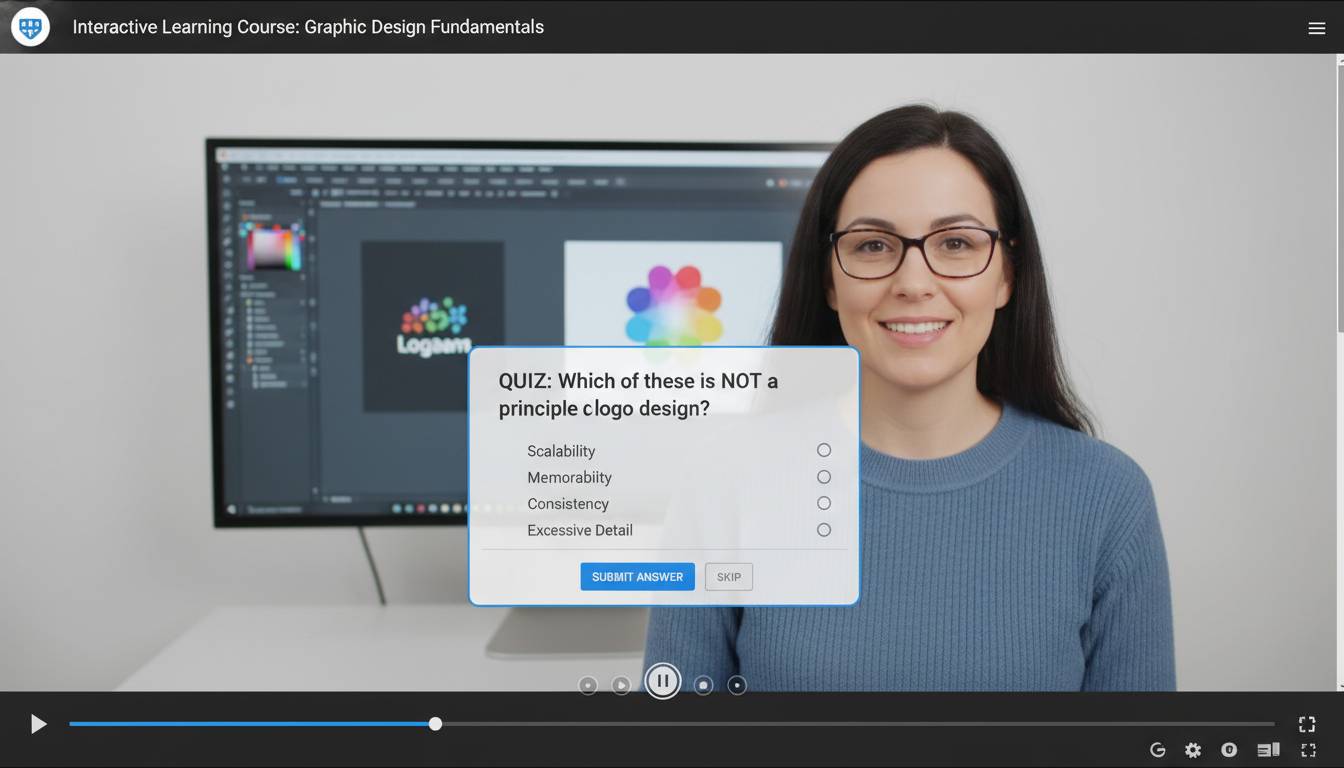
Picture yourself watching a training video where the content adapts based on your responses—where a wrong answer triggers additional explanation, and correct choices reveal advanced material. This isn’t futuristic speculation; it’s the reality of interactive learning videos available to educators and trainers today. Interactive videos transform passive viewers into active participants, creating learning experiences that respond to viewer actions through embedded choices, quizzes, and branching pathways.
Throughout my work developing digital learning solutions for corporate clients and educational institutions, I’ve observed that the most effective training content moves beyond passive consumption. Unlike traditional lecture-style recordings, interactive video creates genuine engagement loops that measurably improve knowledge retention. This guide walks you through creating professional-quality interactive learning videos using entirely free tools—no budget required.
Key Insights
– Interactive video increases completion rates by 35-50% over standard video
– Free platforms now offer features previously only available in paid software
– You can create branching scenarios without any coding knowledge
– Mobile-friendly interactive video reaches learners wherever they are
What Makes Learning Videos Truly Interactive
Interactive learning videos differ fundamentally from standard recordings. They create a two-way communication channel where viewers make decisions that influence content delivery, pace, and sometimes even the learning path itself.
Types of Interactivity
Hotspot interactions let viewers click specific areas within video frames to reveal additional information, definitions, or related content. A biology instructor might film a cell diagram where clicking each organelle displays its function in a pop-up overlay. This approach works exceptionally well for visual-heavy subjects like anatomy, geography, or equipment identification.
Branching scenarios present decision points where viewer choices determine subsequent content. If you’re teaching customer service skills, you might show a difficult customer interaction, then ask viewers to choose between three response options. Each choice leads to different outcomes—some successful, some requiring retry. This experiential approach builds practical decision-making skills.
In-video quizzes check comprehension at strategic moments. Rather than waiting until video completion, these embedded assessments confirm understanding before moving forward. Research published in the Journal of Educational Psychology demonstrates that immediate feedback loops significantly enhance learning outcomes compared to delayed assessment.
Interactive timelines allow learners to navigate through historical events or process flows at their own pace. Instead of watching a linear 15-minute explanation of a product development cycle, viewers click individual stages to access detailed breakdowns—perfect for complex multi-step procedures.
The common thread across all interactivity types: viewers control their experience rather than passively receiving information. This agency drives deeper cognitive processing and better long-term retention.
Top Free Tools for Creating Interactive Videos
Several platforms now offer robust interactive video capabilities without charging for basic features. In my experience testing these tools with various client projects, understanding each platform’s strengths helps you choose the right fit for your specific project needs.
H5P (Free, Open-Source)
H5P powers interactive video creation through its Course Presentation and Interactive Video content types. The platform runs entirely in your browser—no software installation required. You upload a video from your computer or paste a YouTube URL, then add interaction types directly onto the video timeline.
Strengths: Extensive interaction library (35+ content types), no account required for basic use, exports as embeddable code
Best for: Educators, corporate trainers, nonprofit organizations
Limitations: Requires some learning curve; advanced features need self-hosting
H5P’s Interactive Video content type supports chapter markers, bookmarks, and various overlay interactions. You can add multiple-choice questions, fill-in-the-blank exercises, and drag-and-drop activities at any point in your video. The platform also tracks completion rates and quiz scores if you connect it to an LMS.
YouTube (Free)
YouTube’s native tools have expanded significantly, though they’re less comprehensive than dedicated interactive platforms. You can add cards (which link to other videos, playlists, or external sites) and end screens directing viewers to specific actions.
Strengths: Massive reach, excellent analytics, no hosting costs
Best for: Creating teaser content that drives traffic to fuller courses
Limitations: Limited true interactivity within videos themselves
YouTube’s primary value lies in its accessibility. Viewers already use the platform, so your content reaches them where they already spend time. Combine YouTube’s reach with H5P by using YouTube videos as the foundation for interactive experiences.
PlayPosit (Free Tier)
PlayPosit specializes in in-video interactions, allowing you to add questions, pop-ups, and branching directly into video content. The free “Bulb” plan includes unlimited basic bulbs with up to 50 learners per bulb.
Strengths: Intuitive interface, real-time analytics, template library
Best for: Teachers, instructional designers, corporate learning teams
Limitations: Free tier limits learner count; some advanced features require paid plans
PlayPosit works with videos hosted elsewhere or uploaded directly. The timestamp-based system makes it easy to schedule interactions precisely when they provide maximum learning value.
Versal (Free)
Versal offers a comprehensive course creation platform with strong interactive video capabilities. The free version includes unlimited courses with up to 100 learners.
Strengths: Beautiful templates, course analytics, learning pathways
Best for: Creating complete courses with multiple interactive elements
Limitations: Learning curve for first-time users
| Tool | Best For | Interaction Types | Learner Limit | Cost |
|---|---|---|---|---|
| H5P | Open-source flexibility | 35+ | Unlimited | Free |
| YouTube | Reach & accessibility | Cards, end screens | Unlimited | Free |
| PlayPosit | In-video quizzes | Questions, pop-ups | 50/bulb | Free tier |
| Versal | Complete courses | Multiple types | 100/course | Free tier |
Step-by-Step: Creating Your First Interactive Video
Building an interactive learning video involves five distinct phases. Following this process ensures your final product achieves learning objectives while maintaining viewer engagement.
Phase 1: Define Learning Objectives
Before touching any software, clarify what viewers should know or be able to do after watching. Write specific, measurable objectives using action verbs: “Upon completion, learners will be able to identify three signs of phishing emails” rather than “learn about cybersecurity.”
This clarity guides every subsequent decision. You cannot design effective interactions without knowing exactly what you’re testing or reinforcing. Map each objective to specific interaction points in your video script.
Phase 2: Script and Storyboard
Traditional video scripts work differently for interactive content. You must account for multiple possible viewer paths, which means writing branches and decision points into your script.
For a 10-minute interactive video with three major decision points and two outcomes per branch, you might write 15-20 minutes of total content—though viewers will only experience 10 minutes based on their choices.
Storyboarding template:
- Scene 1: Opening context (what viewers see before any choice)
- Decision point 1: Question + 3 response options
- Branch A: Feedback on choice A + continuation
- Branch B: Feedback on choice B + continuation
- Decision point 2: Next question + 2-3 options
- Continue through remaining objectives
- Ending: Summary + next steps
This document becomes your production roadmap, ensuring you film or capture everything needed for all possible paths.
Phase 3: Record or Source Video
For interactive video, you have three source options:
Self-recorded footage provides maximum customization. Use your smartphone, webcam, or screen recording software. Good lighting and clear audio matter more than expensive equipment. Free tools like OBS Studio (for screen recording) and DaVinci Resolve (for editing) produce professional results without costs.
Stock video works well for contexts outside your expertise or when illustration adds clarity. Pexels, Pixabay, and Unsplash offer free stock video libraries. Combine multiple clips to tell your story without appearing generic.
Slideshow with narration remains the most accessible option. PowerPoint, Google Slides, or Canva presentations narrated with free audio recording tools (like Audacity) create surprisingly effective learning content.
Phase 4: Add Interactivity
Import your finished video into your chosen platform and add interaction layers.
Start with engagement hooks. Within the first 30 seconds, invite viewers into the experience. A question they must answer or a scenario they must evaluate creates immediate investment. Avoid starting with “In this video, we’ll cover…” Instead, present a problem or question that motivates the content.
Space interactions appropriately. Research suggests interaction every 3-5 minutes maintains attention without fragmenting content too severely. Quiz after explaining a key concept, not before you’ve established context.
Provide meaningful feedback. When viewers answer incorrectly, explain why—and offer the right answer. This feedback transforms mistakes into learning opportunities rather than mere errors.
Include navigation aids. Show viewers their progress through the video. Let them know how many interactions remain and provide clear “continue” or “replay” options after each segment.
Phase 5: Test and Iterate
Before publishing, watch your interactive video multiple times, testing every path. Ask colleagues to do the same—they’ll find issues you missed. Check that:
- All buttons and clickable elements function
- Quiz answers score correctly
- Branching paths all lead to appropriate endpoints
- Video plays smoothly on different devices and browsers
- Audio is clear and properly synced
Design Best Practices for Maximum Engagement
Creating interactive video is only half the battle. Thoughtful design choices determine whether viewers engage meaningfully or click through impatiently.
Keep Load Times Fast
Nothing kills engagement like waiting. Compress videos appropriately—720p resolution often suffices for screen recordings and presentations. Large video files frustrate mobile users especially. Test your interactive video on the slowest connection you expect your audience to use.
Design for Mobile First
Analytics from multiple platforms indicate that over 60% of video views now happen on mobile devices. Interactive elements must be large enough to tap easily. Text overlays need readable font sizes. Any horizontal or landscape content should function adequately in portrait mode. Test your interactive video on actual phones, not just desktop browsers.
Use Consistent Visual Language
Create a simple visual system and apply it consistently. Use the same color for correct answers across all quizzes. Make interactive elements visually distinct from static content. Apply consistent icons for navigation (arrows for forward, house icons for home, etc.).
Balance Fun and Function
Interactivity should serve learning, not merely entertain. Ask yourself: “Does this interaction help learners achieve the objective, or does it just add novelty?” The best interactive videos make engagement feel natural rather than gamified for its own sake.
Respect Viewer Time
Not everyone wants maximum interaction. Always provide a “skip” or “continue without answering” option for optional activities. Some viewers want to move quickly through familiar content. Interactive elements should enhance the experience for those who want depth, not slow down those who don’t.
Common Mistakes and How to Avoid Them
New creators often make predictable errors that undermine their interactive videos. Learning from these mistakes saves significant rework time.
Mistake #1: Too Many Interactions
Problem: Loading every minute with questions, pop-ups, and choices fragments learning into disconnected bits. Viewers spend more time clicking than thinking.
Solution: Limit yourself to 4-6 meaningful interactions per 10 minutes of video. Each should reinforce a critical concept or check essential understanding. Ask: “Will this interaction measurably improve learning?” If not, remove it.
Mistake #2: Wrong Interaction Types
Problem: Using multiple-choice questions when drag-and-drop would better suit the content wastes potential engagement. Matching activities work better for associations; branching scenarios work better for decision-making skills.
Solution: Match interaction type to learning objective. Vocabulary retention → matching or flashcard interactions. Process understanding → sequencing activities. Judgment skills → branching scenarios with consequences.
Mistake #3: Ignoring Accessibility
Problem: Videos without captions exclude deaf viewers. Interactive elements that rely solely on color exclude colorblind viewers. Small click targets exclude users with motor difficulties.
Solution: Add accurate captions to all video content. Use text labels in addition to color cues. Ensure all interactive elements meet WCAG guidelines for size and keyboard accessibility.
Mistake #4: No Clear Path
Problem: Open-ended interactivity without guidance leaves viewers uncertain about what to do next. Too many choices without direction creates decision fatigue.
Solution: Provide explicit instructions at the beginning. Use progress indicators. Ensure at least one clear “correct” path through content, even if exploration is possible.
Measuring Success and Iterating
Understanding how viewers engage with your interactive video enables continuous improvement. Each platform offers different analytics—learn to interpret them meaningfully.
Key Metrics to Track
Completion rate shows what percentage of viewers finish the video. Interactive videos should achieve higher completion than passive content, but if yours doesn’t, examine where viewers drop off. High drop-off at specific interaction points often indicates confusion or frustration.
Quiz performance reveals content areas where understanding is weak. Consistently incorrect answers to specific questions suggest you need to explain those concepts more clearly before quizzing.
Time spent metrics show whether viewers are rushing through or spending appropriate time with content. Very fast completion might indicate clicking-through without engaging; very slow might indicate difficulty with interface