
 March 20, 2026
  11 Min
  No Comment
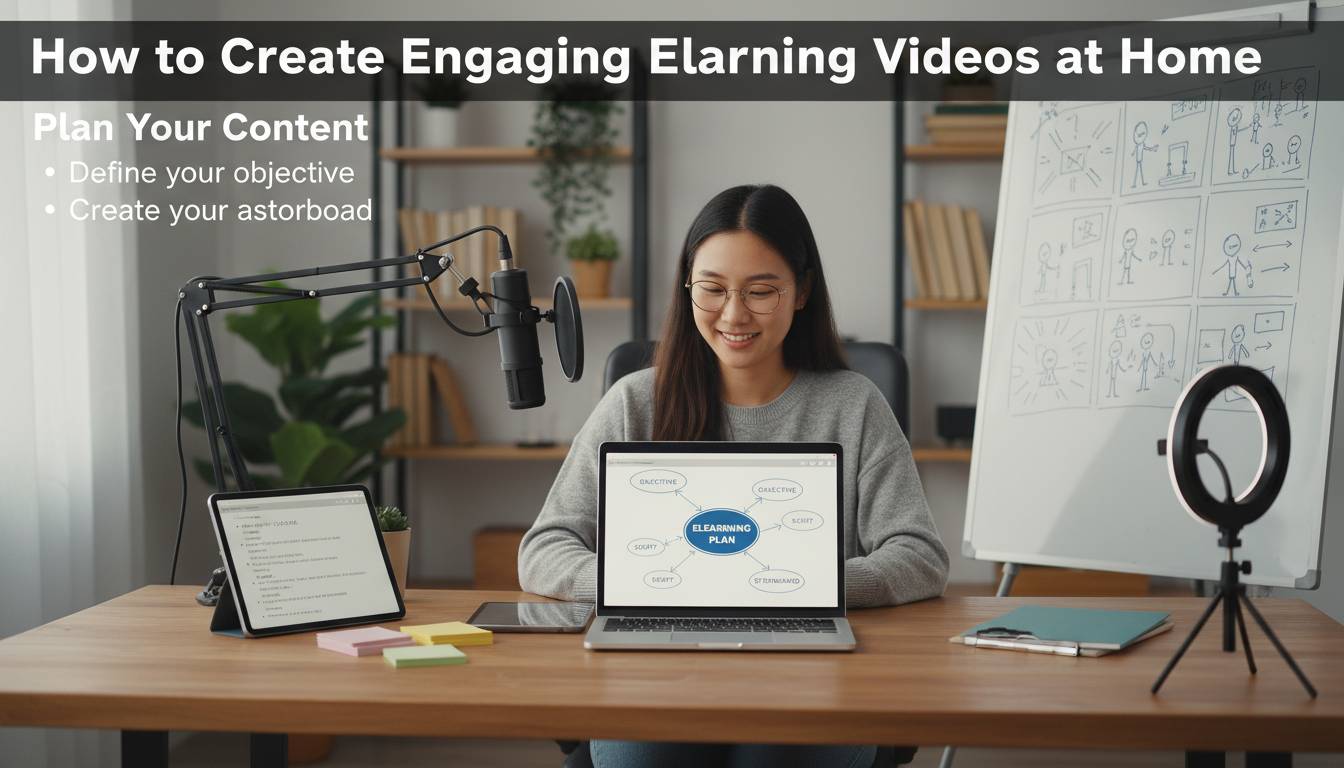
Creating compelling eLearning videos from home isn’t about having a Hollywood budget—it’s about understanding what keeps learners engaged and applying proven techniques that work with equipment you already own. Whether you’re a teacher transitioning to online instruction, a corporate trainer building a knowledge base, or an individual creator developing courses, the principles of engaging video production remain consistent across contexts.
This guide walks you through the complete process, from planning and recording to editing and publishing, with specific tactics you can implement immediately using freely available tools.
What Actually Makes eLearning Videos Work
Learner engagement in video-based learning depends on three interconnected factors: cognitive load management, active learning integration, and production quality that doesn’t distract from content. Research from the Journal of Computing in Higher Education indicates that videos exceeding 15 minutes without interaction points experience a significant drop-off in completion rates, with viewer attention declining by approximately 40% after the 10-minute mark.
Key Engagement Drivers
| Factor | Impact on Completion | Implementation Priority |
|---|---|---|
| Video length (under 10 min) | +35% completion rate | Critical |
| Visual variety | +28% information retention | High |
| Pacing with pauses | +22% comprehension | High |
| Audio clarity | +40% perceived quality | Critical |
| Interactive elements | +45% engagement | Medium |
The most common mistake home creators make is prioritizing equipment quality over structural planning. A smartphone recording with excellent content architecture will outperform a 4K studio production with poor pacing every time. Your goal isn’t to create cinematic perfection—it’s to facilitate learning efficiently.
Essential Equipment for Home Video Production
You don’t need expensive gear to create professional-quality eLearning videos. Most successful online educators produce their courses using equipment that costs less than $500 total.
The Minimal Setup (Under $150)
- Smartphone with good camera (2018 or newer): Modern phones shoot 4K video that exceeds most laptop webcams
- Lavalier microphone: $20-40 for wired options like the Purple Panda or Movo WMIC-10 wireless systems that eliminate background noise
- Ring light or softbox: $25-40 provides consistent, flattering lighting that eliminates harsh shadows
- Simple tripod with phone mount: $15-25 keeps footage stable
Recording Space Setup
Your background matters more than equipment. A cluttered or distracting environment pulls focus from your content. Ideal setups include:
- A clean wall with neutral color (light gray or blue performs well on camera)
- Bookshelf or plants for professional context without visual chaos
- Consistent lighting from in front of you (never with a window behind—you’ll appear silhouetted)
For audio, record in the smallest room available with soft furnishings. Closets filled with clothes work remarkably well as natural sound dampeners. The goal is eliminating echo and ambient noise that makes content difficult to understand.
Planning Your Content for Maximum Engagement
Production quality cannot rescue poorly structured content. Before pressing record, invest time in the planning phase that determines whether learners retain information.
Scripting vs. Outlining
Full scripts work well for highly technical content where precision matters, but they create a stiff, rehearsed feel. Outlines with key points and transitions produce more natural delivery. For most eLearning applications, a hybrid approach works best: write complete scripts for introductions and complex explanations, then use bullet-point outlines for sections where conversational delivery enhances engagement.
Effective Video Structure (Any Subject)
- Hook (30 seconds): State the specific problem you’ll solve and the outcome learners will achieve
- Roadmap (30 seconds): Preview the main points you’ll cover
- Content blocks (3-5 minutes each): Each major concept gets dedicated time with examples
- Summary (1 minute): Recap key takeaways in your own words
- Call to action (30 seconds): Prompt next steps—quiz, practice exercise, or next video
Visual Planning
Engagement increases dramatically when you plan visual elements alongside audio content. Sketch simple frame compositions or create a shot list that specifies what appears on screen during each section. Common effective approaches include:
- Picture-in-picture: Small video of you in corner while showing slides or screen recordings
- Split screen: You on one side, content on the other
- Visual demonstrations: Showing your hands working through processes (especially valuable for technical or procedural content)
- Annotated graphics: Highlighting key points on images or slides as you speak
Recording Techniques That Captivate Learners
With planning complete, execution requires attention to delivery fundamentals that affect how learners perceive your content.
Camera Positioning and Framing
Frame yourself from the chest or waist up, with your eyes approximately one-third from the top of the frame. This creates a comfortable viewing experience that feels like in-person communication. Maintain eye contact by looking at the camera lens (not the screen) when speaking—this creates the connection that keeps viewers engaged.
Delivery Pacing
Speak slightly slower than normal conversation—about 130-150 words per minute. This measured pace gives learners time to process and note-taking becomes possible without rewinding. Pause for 2-3 seconds after making key points. These silences feel awkward when you hear them playback, but they dramatically improve comprehension.
Common Recording Mistakes
| Mistake | Impact | Solution |
|---|---|---|
| Reading directly from notes | Reduces eye contact, feels scripted | Use notes as reference, look up frequently |
| Fidgeting or repetitive gestures | Distracts from content | Keep hands still, minimize movement |
| Varying volume dramatically | Forces viewer to adjust | Maintain consistent speaking volume |
| Speaking while turning toward materials | Audio quality drops | Complete thought, then turn |
Editing Fundamentals for Professional Results
Editing transforms raw recordings into polished learning experiences. Even basic editing dramatically improves results when you apply the right techniques.
Free Editing Tools That Professional Use
- DaVinci Resolve: Full professional-grade software with color correction, entirely free
- CapCut: Excellent for quick cuts, text overlays, and transitions; free with watermark removal for desktop
- iMovie (Mac): Simple, intuitive, sufficient for basic editing
- Camtasia: Paid option with built-in screen recording and annotation tools popular in corporate training
Essential Editing Techniques
Cutting for Pacing: Remove filler words (“um,” “uh,” “like,” “you know”) and long pauses during editing. Cut sentences mid-thought if you rambled and restart from the correct point. These small edits dramatically increase perceived professionalism.
Adding Visual Cues: Text overlays that reinforce key terms, arrows highlighting important areas, and zoom effects drawing attention to specific content elements all increase retention. Most learners watch videos while multitasking; visual cues help them catch important points even with divided attention.
Strategic Chapter Markers: Break longer videos into chapters with clear titles. This allows learners to find specific information later and provides natural pause points that reduce fatigue.
Audio Editing Basics
Poor audio ruins otherwise excellent content faster than any other factor. Apply basic processing:
- Noise reduction: Remove background hum or room echo
- Compression: Even out volume differences between quiet and loud passages
- Normalization: Ensure consistent levels throughout
Optimizing Videos for Online Learning Platforms
Creating the video is only half the battle—proper optimization ensures learners can access and benefit from your content.
File Specifications
Different platforms have different requirements, but these specifications work universally:
- Format: MP4 with H.264 codec for maximum compatibility
- Resolution: 1080p (1920×1080) provides good balance of quality and file size; 4K is unnecessary for screen content
- Frame rate: 30fps is standard and sufficient; 24fps appears more cinematic but can feel stiltier for instructional content
- Bitrate: 4,000-8,000 kbps for 1080p provides quality without excessive file sizes
Platform-Specific Considerations
YouTube: Automatic captions available; excellent for searchable video libraries; learners can adjust playback speed
Vimeo: Cleaner player without ads; good for course platforms; some caption automation
LMS (Learning Management Systems): Consider SCORM compatibility for tracking; verify supported formats before upload
Accessibility Requirements
Accessible content serves all learners better and often meets legal requirements:
- Captions: Upload accurate caption files (not auto-generated—these contain errors)
- Audio descriptions: For visual-heavy content, provide verbal descriptions of important visuals
- Transcript: Full text version available for download or reading
Advanced Strategies to Boost Completion Rates
Once you’ve mastered fundamentals, these advanced techniques significantly improve learning outcomes and learner satisfaction.
Microlearning Integration
Breaking content into modular pieces—typically 3-7 minutes per video—aligns with how modern learners consume information. This approach, called microlearning, has shown 50% higher completion rates compared to longer-format content in corporate training environments.
Structure courses around single learning objectives per video. A 45-minute traditional lecture becomes a series of 6-8 focused videos, each addressing one specific skill or concept. Learners can complete one segment during a coffee break and resume later without losing momentum.
Interactive Elements
Adding interaction transforms passive viewing into active learning:
- Quiz questions inserted at strategic points verify comprehension before moving forward
- Reflection prompts pause video and ask learners to consider their own experience before revealing answers
- Practice activities guide learners through applying concepts in their own context
Tools like H5P (free, open-source) integrate with many learning platforms to add these interactive elements without requiring technical expertise.
Establishing Your Teaching Presence
Learners engage more deeply with instructors they feel connected to. Build connection through:
- Personal anecdotes: Brief, relevant stories that illustrate points and humanize you
- Direct address: Speaking to “you” rather than about “students” or “learners”
- Genuine enthusiasm: Your energy transfers through the screen—let your interest in the subject show
Frequently Asked Questions
What equipment do I need to start creating eLearning videos?
You can begin with just a smartphone, which shoots quality HD video, and free recording apps. A decent lavalier microphone ($20-40) dramatically improves audio quality, which learners notice more than visual improvements. A simple tripod keeps footage stable. Total initial investment can be under $100.
How long should my eLearning videos be?
Aim for 5-10 minutes per video for optimal engagement. Research shows attention drops significantly after 10 minutes without interaction. Breaking content into focused segments also helps learners fit learning into busy schedules and improves knowledge retention.
Do I need to script my videos completely?
Full scripts work for technical content requiring precision, but they often feel stiff. Most creators benefit from detailed outlines with key points and transitions—this produces more natural delivery while ensuring you cover essential information. Practice before recording to reduce filler words.
How can I make my videos more engaging without being distracting?
Focus on visual variety: switch between talking-head footage, screen recordings, and supporting graphics. Add text overlays for key terms, but avoid excessive animations. Maintain good pacing by varying your tone, pausing after important points, and cutting unnecessary content during editing.
What free tools can I use for video editing?
DaVinci Resolve offers professional-grade editing entirely free. CapCut provides excellent quick-editing features for desktop. Both support adding text, transitions, and basic effects. For screen recording, OBS Studio (free, open-source) captures your screen with audio at professional quality.
How do I know if my videos are actually effective?
Track completion rates and quiz scores if using a learning management system. Ask for feedback directly—simple surveys reveal whether learners found content valuable and what confused them. Watch your own videos critically: identify moments where attention likely wavered and experiment with different approaches in future content.
Moving Forward
Creating engaging eLearning videos at home comes down to understanding your learners and applying consistent techniques that reduce friction in the learning process. Start with simple equipment you already own. Focus on planning before recording. Prioritize clear audio over perfect visuals. Break content into focused segments that respect learners’ time and attention.
The most effective online educators aren’t those with the biggest budgets—they’re those who consistently show up for their learners with well-structured content delivered in an accessible, relatable way. Your first videos won’t be perfect, and that’s the point. Each video you create builds your skills and helps you understand what resonates with your specific audience.
Begin with one video addressing a single learning objective. Apply these principles from planning through publication. Then create another. The compound effect of consistent improvement will transform your teaching practice and create learning experiences that actually work.